Week Eight (MGDP2050)
Lecture notes and exercises for Week Eight of Web Design and Development II (MGDP2050).
See also Week Seven (MGDP2050) - Week Nine (MGDP2050).
- UPDATE: lecture cancelled.
- Students, try to do the exercise on your own, email me if you have questions.
- I have added details (Saturday morning) about how to use jQuery UI.
The Week Eight lecture notes have been moved here (to de-clutter this page).
Contents
- 1 Exercises: in-class
- 1.1 Goal: demonstrate jQuery UI components
- 1.2 Browse the jQuery UI demos
- 1.3 Download and install jQuery UI
- 1.4 Instructor's example: files
- 1.5 Instructor's example: jQuery UI Components
- 1.6 Instructor's example: Dialog component
- 1.7 Instructor's example: CSS
- 1.8 Instructor's example: HTML for link
- 1.9 Instructor's example: HTML for Dialog
- 1.10 Instructor's example: JavaScript
- 1.11 Instructor's example: Dialog component screenshot
- 1.12 Instructor's example: Dialog component text
- 1.13 Create folder named week8
- 1.14 Create web page
- 1.15 Demonstrate a jQuery UI component
- 1.16 Update your home page
- 1.17 Upload to web server
- 2 Exercises: for next week
- 3 Reading for next week
Exercises: in-class
Goal: demonstrate jQuery UI components
First goal, create folder named week8 and demonstrate the jQuery UI component, something like this:
Click the "Open dialog" button to confirm that the dialog box works.
Note that some text is too small. Also, the dialog box has different colors from the rest of the page. How do we fix this?
I created the example in the usual way:
- Create a week8 folder
- Copy the index.html page from a previous exercise
- Paste into the week8 folder
- Update the page title, and change the contents to this week's exercise
Then I copied sections of jQuery UI example page (which is part of the jQuery UI download), and pasted those sections into my exercise page.
Here is the jQuery UI example page:
Find the example page in your own jQuery UI folder, open it in a text editor, and copy-and-paste the sections you need.
The remainder of this page discusses the process in more detail.
Final goal, demonstrate three different jQuery UI components.
Browse the jQuery UI demos
Browse the jQuery UI demos.
Try several.
Pick three which interest you.
Download and install jQuery UI
Browse the jQuery UI website:
Click the "Stable" link (in the Quick Downloads section).
- This will download a Zip file containing the jQuery UI files.
Unzip the Zip file, if necessary, to get the jQuery UI folder.
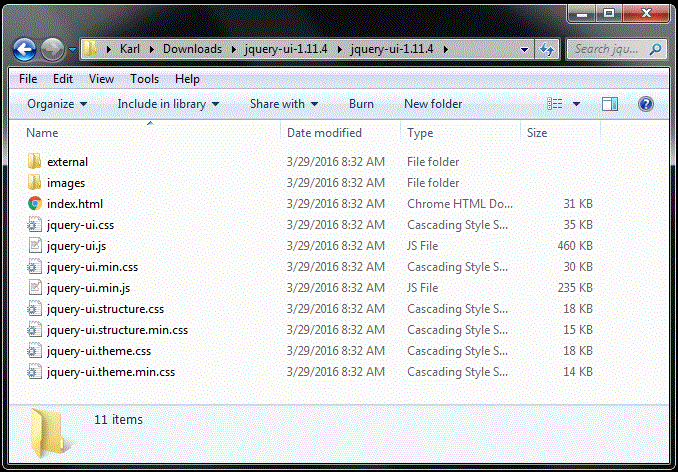
There is a first folder named jquery-ui-1.11.4 (or something similar -- version number may increase).
This folder contains a second folder with the same name, containing the jQuery UI files and subfolders. This is the actual jQuery UI folder.
Instructor's example: files
Move the jQuery UI folder to your local root folder.
You can now use jQuery UI in your web pages.
Instructor's example: jQuery UI Components
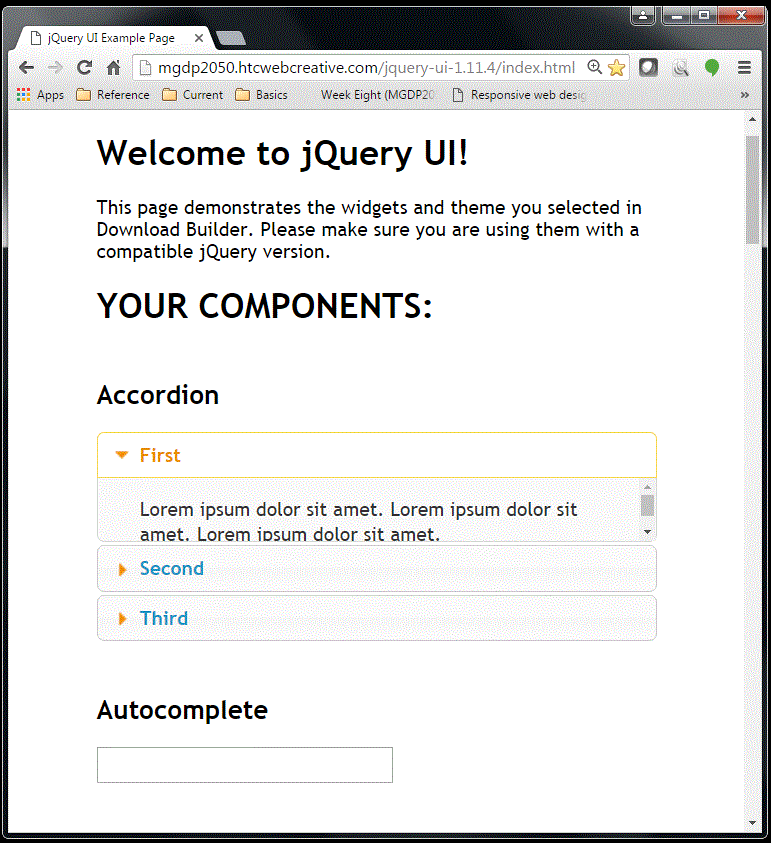
The jQuery UI folder contains a web page named index.html which demonstrates the components.
Link to the instructor's page:
The screeshot below shows the Components page in a web browser:
Instructor's example: Dialog component
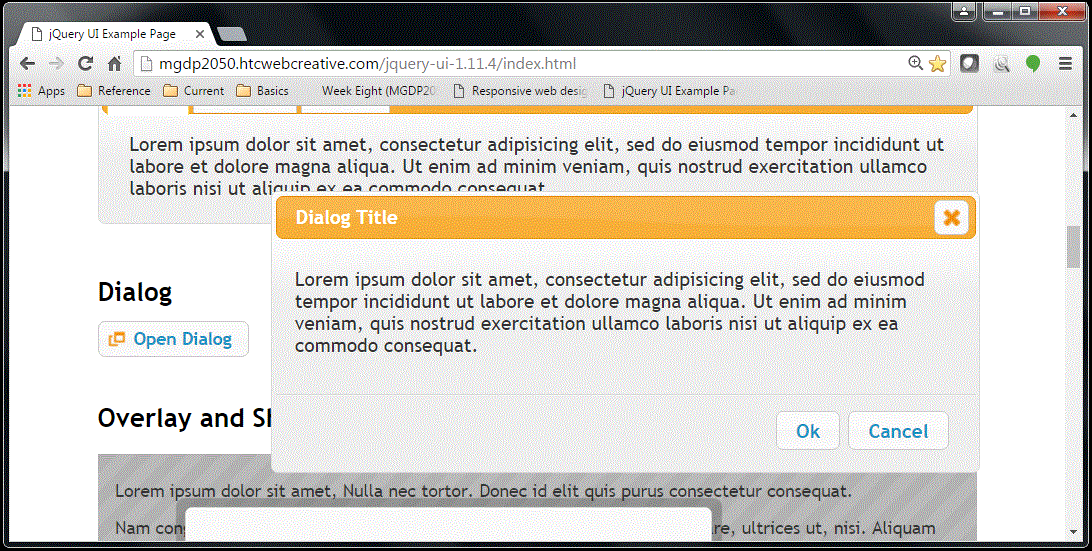
The screenshot below show the Components page, scrolled down the Dialog button
The button has already been clicked to reveal the Dialog box.
Based on this demo:
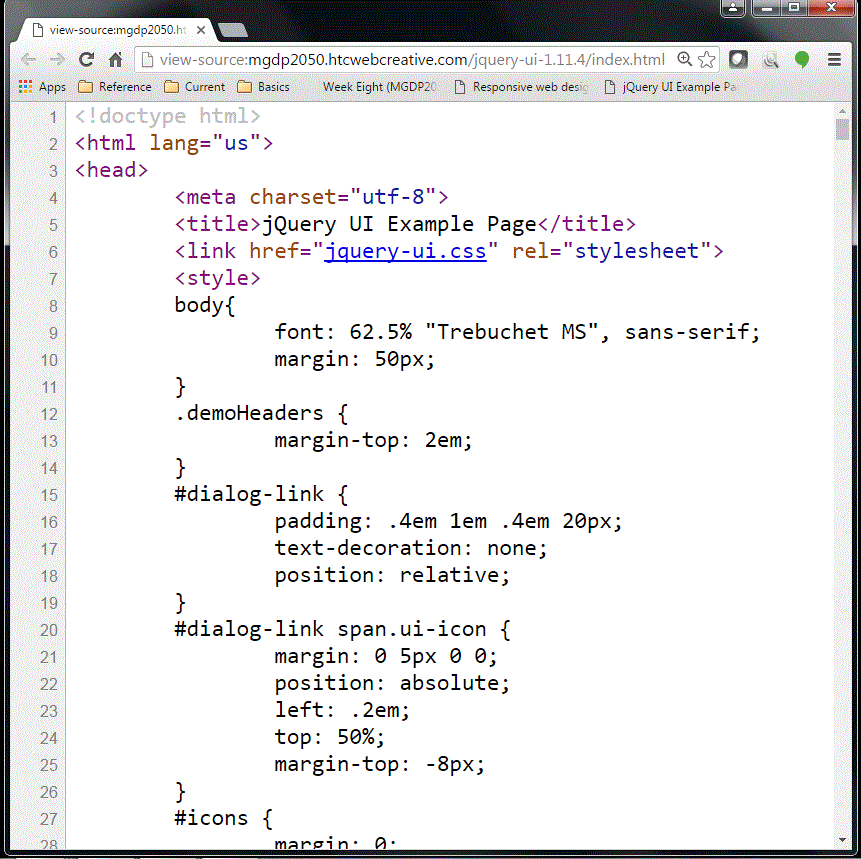
Instructor's example: CSS
Screenshot of source code -- note the external CSS file, and the internal CSS styles:
Instructor's example: HTML for link
The screenshot below shows the HTML for the link that launches the Dialog component:
Instructor's example: HTML for Dialog
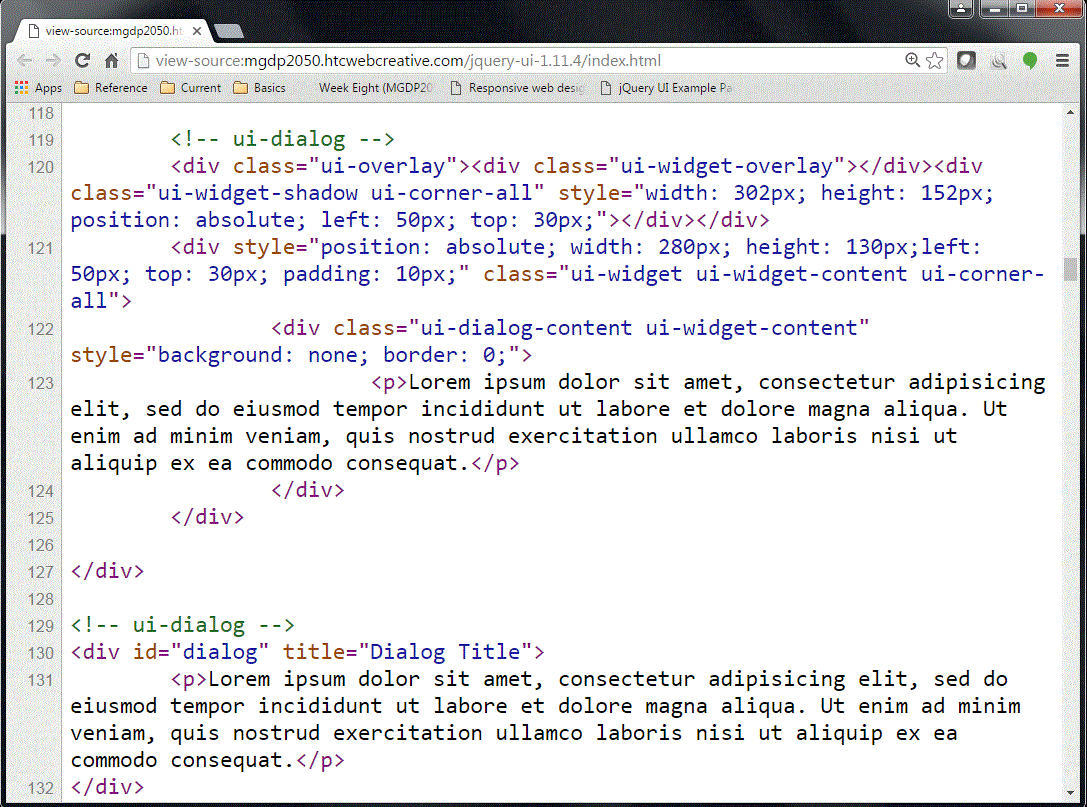
The screenshot below shows the HTML for the Dialog itself:
Instructor's example: JavaScript
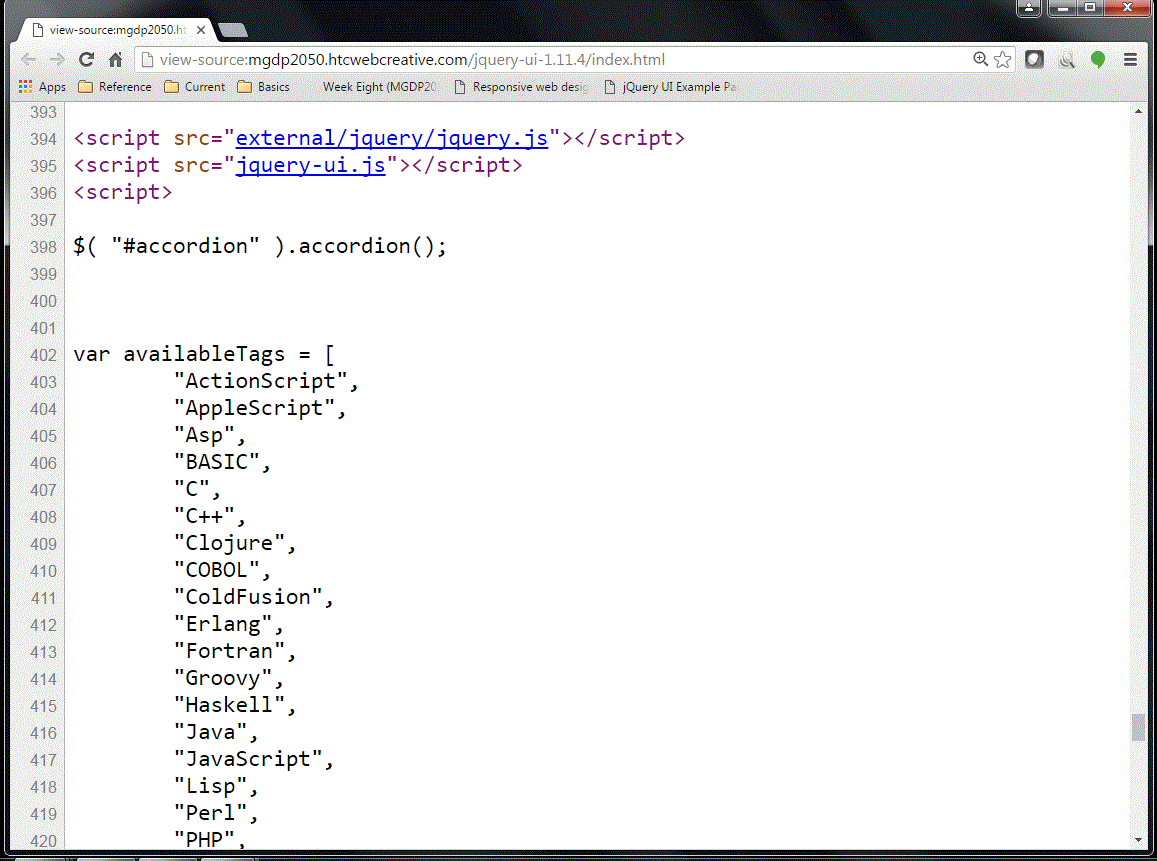
The screenshot below shows some of the JavaScript for the instructor's Sample components page.
Note the external JavaScript files, and some internal JavaScript (only first portion shown here).
Instructor's example: Dialog component screenshot
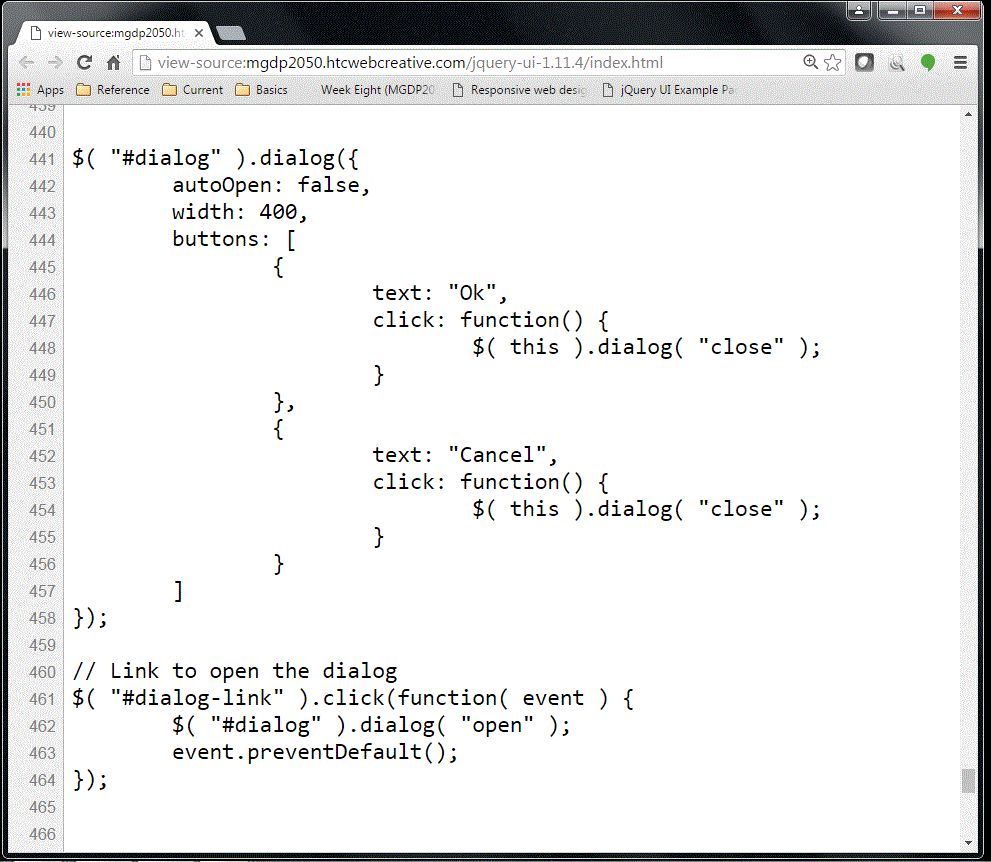
The screenshot below shows the internal JavaScript for the Dialog component example:
Instructor's example: Dialog component text
Here is the JavaScript for the Dialog box:
$( "#dialog" ).dialog({
	autoOpen: false,
	width: 400,
	buttons: [
		{
			text: "Ok",
			click: function() {
				$( this ).dialog( "close" );
			}
		},
		{
			text: "Cancel",
			click: function() {
				$( this ).dialog( "close" );
			}
		}
	]
});

// Link to open the dialog
$( "#dialog-link" ).click(function( event ) {
	$( "#dialog" ).dialog( "open" );
	event.preventDefault();
});
Create folder named week8
In your local root folder, create a new folder named week8.
Create web page
In your week8 folder, create a web page named index.html.
- Similar to other exercise pages.
- Set page title, etc.
Demonstrate a jQuery UI component
In your web page, demonstrate a jQuery UI component of your choice.
Update your home page
On your Home page, make a link to your jQuery UI exercise.
Upload to web server
Upload your work to the web server:
- Exercise page
- jQuery UI folder
Exercises: for next week
Demonstrate two more jQuery UI components
Demonstrate two more jQuery UI components of your choice.
You may do this in the same web page, or you may create additional web pages.
- If you create additional web pages, provide links on your home page.
